
In this series of posts, I will show you step-by-step how to connect to the YouTube API to gather basic statistics from your videos. You have to own the YouTube channel to get those metrics from the videos.
In this first article, you will set up the Google Cloud Platform account to create the necessary before the connection. Let’s get started!
Different YouTube APIs
Before starting, it’s necessary to know that YouTube has three different APIs for different purposes:
- YouTube Data v3
- YouTube Analytics v2
- YouTube Reporting v2
You will need to use the first two to retrieve the data from your channel. The second one will provide you with the metrics from each video (views, likes/dislikes, comments). We won’t be using the third one for this project.
Creating the API Keys in Google Cloud Platform
We need to create an API key for the YouTube Data API and an OAuth Client ID for the YouTube Analytics API to connect with YouTube because they have different purposes. I will explain this later in this post.
Your First Project in GCP
As I said, the first step before connecting with YouTube is obtaining an API key from the Google Cloud Platform. To do this, you will need to have a Google email address account. You can create the account on this link.
After that, you need to sign up for the Google Cloud Platform. The first thing it is necessary to do is create a new project, as you can see in the images below:

I suggest you don’t use any word related to Google or their brands (YouTube, Gmail) in the project name. It can be an issue when connecting with the API.
Then, add a name to your project and click on the Create button.

You have created your first project!
Creating the API key
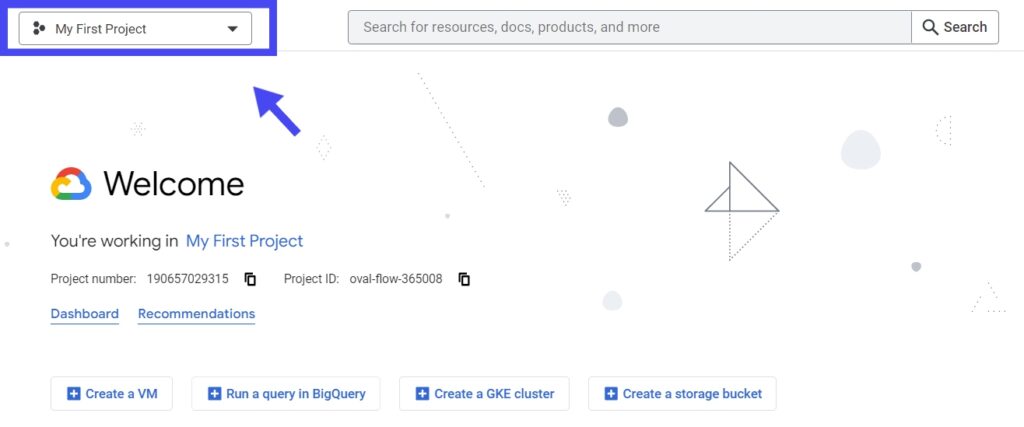
Let’s look at the project by selecting it in the drop-down list located in the left corner and selecting the one recently created:

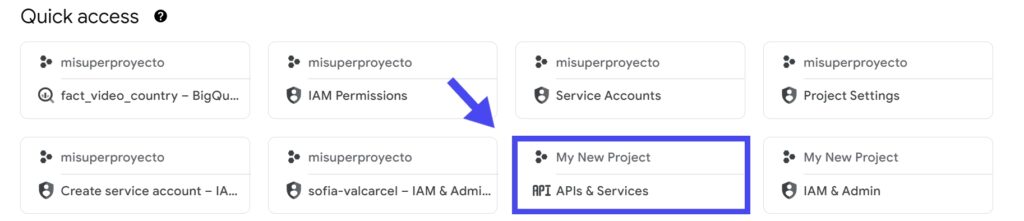
Then, in the Quick Access section, you need to click on API & Services button:
On the new page, you have to click on Enable APIs & Services:

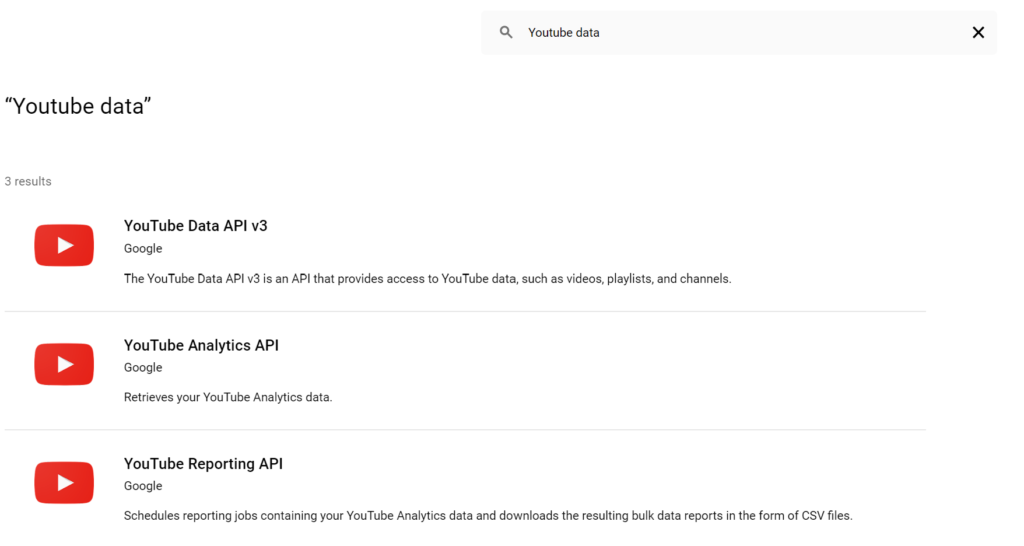
Then, let’s write the term YouTube data on the search bar and press Enter. You will need to install the three APIs, as you see in the image below:

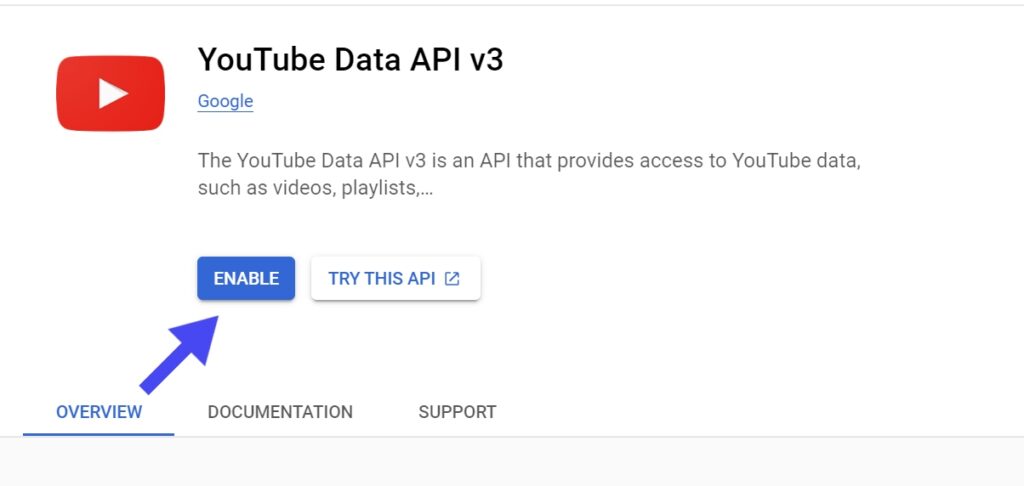
For example, let’s select the YouTube Data API v3. On the next page, you will see a button called Enable. Press it!
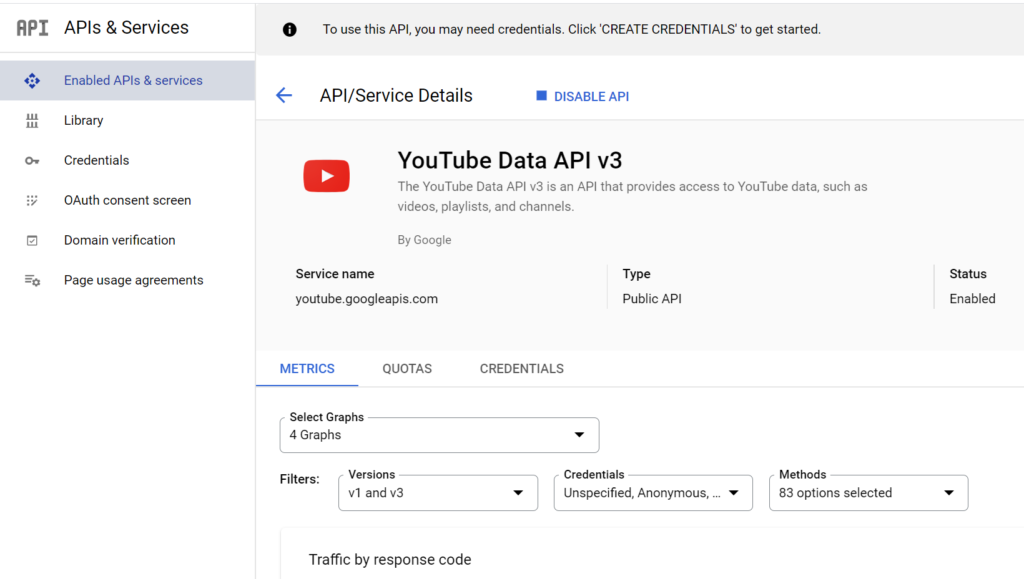
You will land on this page, where you will be able to set up the API key and the OAuth Client IDs. The first one is to retrieve data that is publicly available. The second one is to gather data that belongs to a user specifically, requiring consent.
Now, repeat the same process with the YouTube Analytics API. After that, you are ready to create your API key.
On the API Overview page, you need to click on the Create Credentials button in the right corner.

Then, select YouTube Data API v3 in the drop-down menu and check the Public Data button. After that, click on Next:
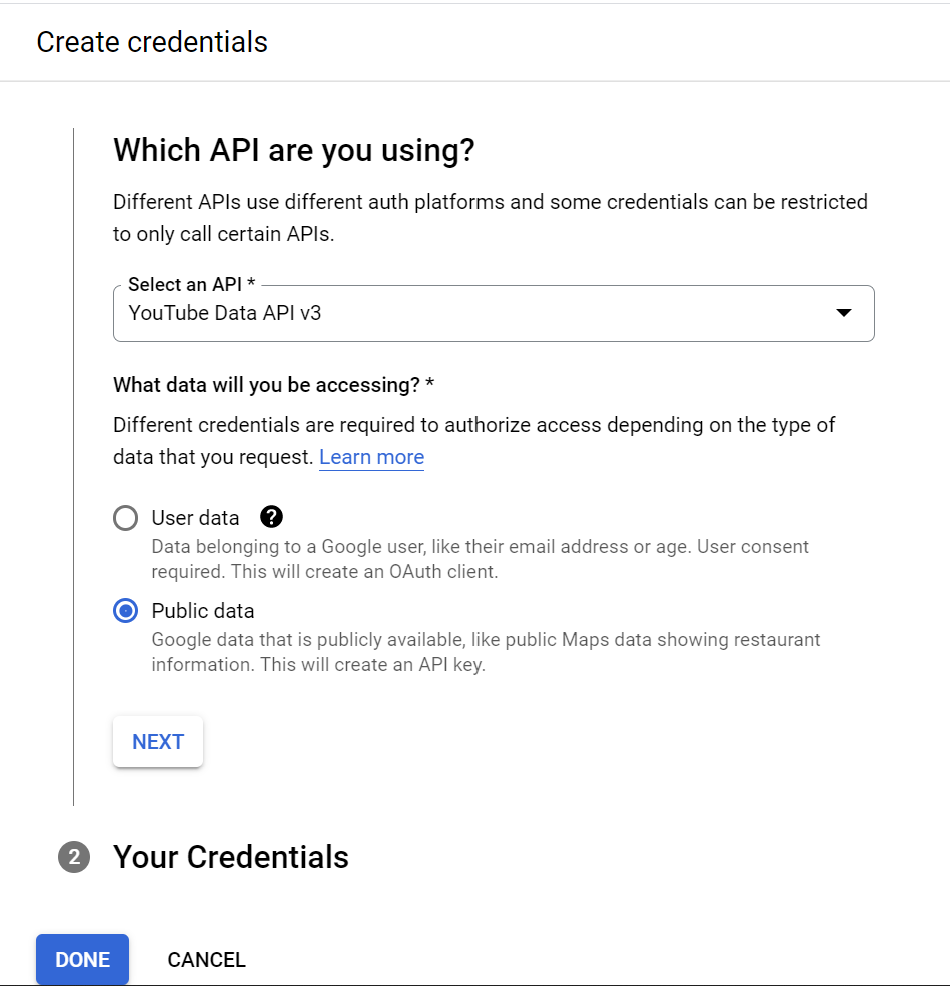
Click on Done. And you will get your API key!

Then, you will be back to the API Overview page.
Creating the OAuth Client ID
You only have one step left: creating an OAuth Client ID to retrieve the data from YouTube Analytics API. First, you need to go to the YouTube Analytics API Overview page.

Then, click on Manage.

After that, click on Credentials in the left panel. You will land on this page:
IMAGE 16
Then, click on the Create Credentials button and select OAuth Client ID.

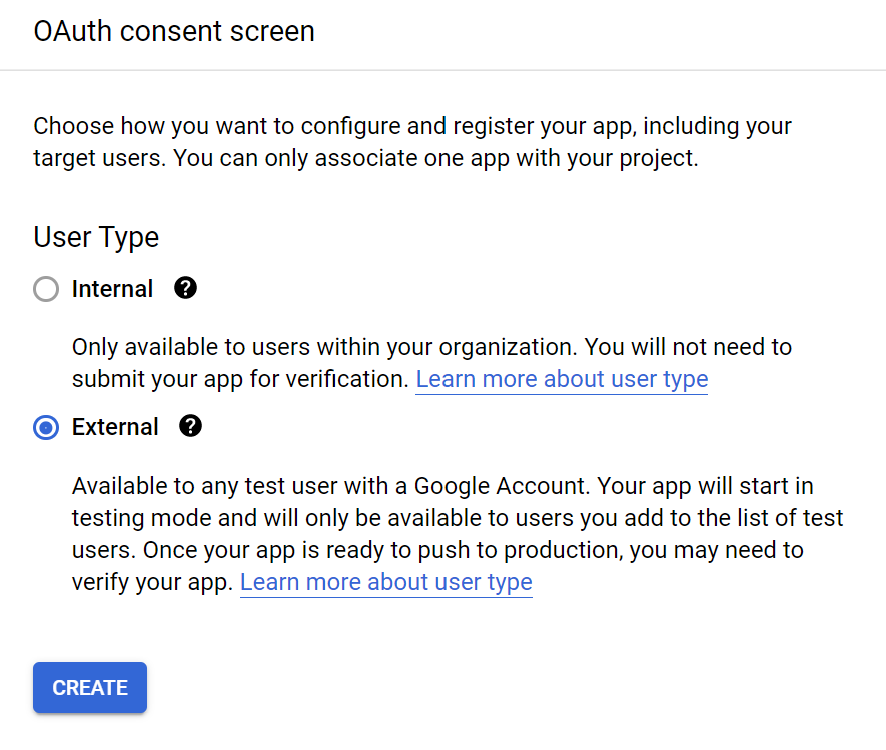
As this is the first time you set up the project, we need to configure the screening consent. You need to click on Configure Consent Screen. Select External and click on Create.

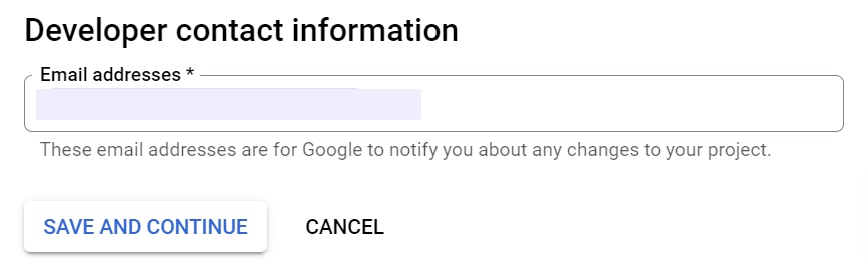
Add the App Information and the Developer Contact Information in the first tab. Leave the App Domain section blank.
IMAGE 20/IMAGE 21

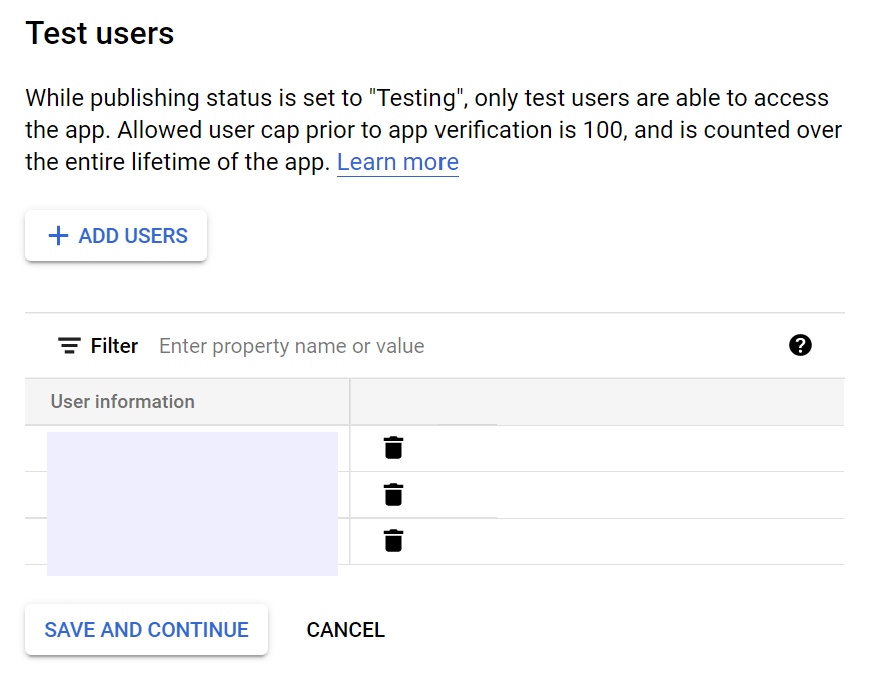
You don’t need to fill anything in the next section, so press Save and Continue. In the next tab, you need to add the accounts that would be able to gather the data. Add the address connected to your YouTube account and the one you used to register your GCP account. Press Save and continue.
IMAGE 22
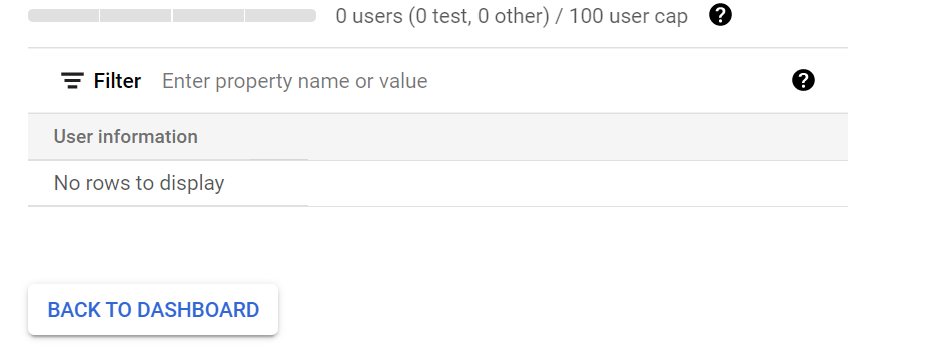
In the next step, you don’t need to update any additional information. Just click on Back to Dashboard.
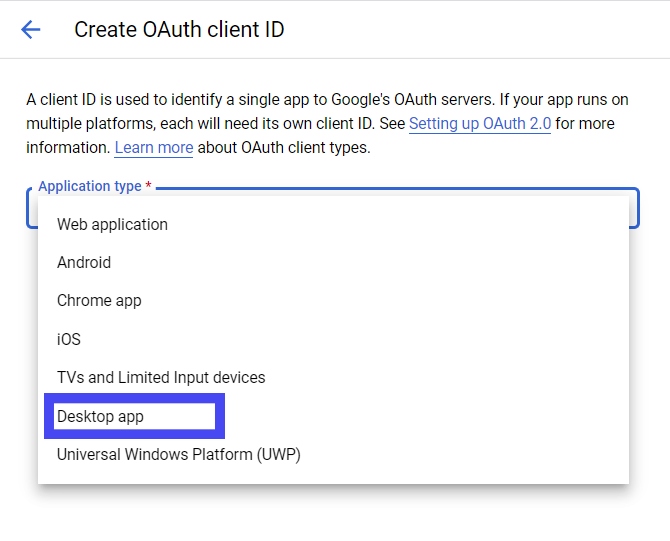
Let’s create the OAuth Client ID now. Click again on Create Credentials and select the second option. Then, you will see this page where you choose the Desktop Version option and add a name for the credential. Click on Create.

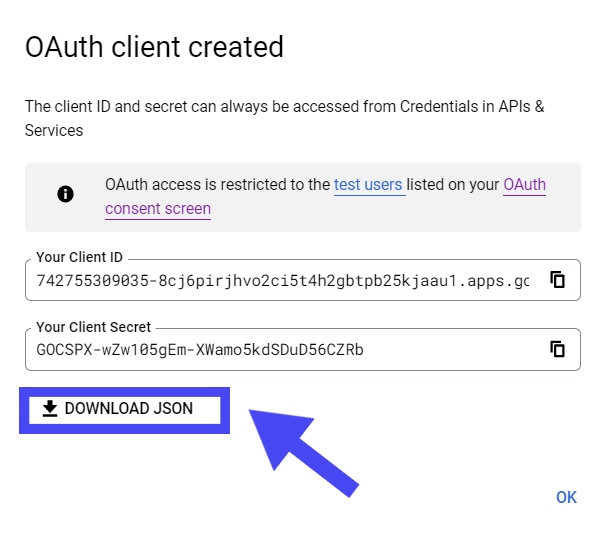
A new pop-up will appear on your screen. Before closing it, click on Download JSON file. You will need it to connect to the API in the following steps.
And this is all! You have already created all the necessary that you need to start with the next step: understanding how the YouTube API works before running the first queries!

